
Get Answers
Yes, mounting hardware should be checked
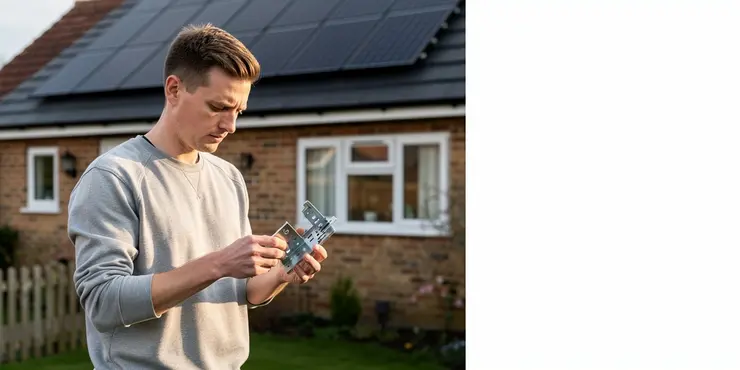
Solar panel maintenance does include checking the mounting hardware. The brackets, rails, clamps, bolts and fixings are what keep the panels secure on your roof or frame. If these parts loosen or corrode, the whole system can become unsafe.
In the UK, this is especially important because panels are exposed to wind, rain and seasonal temperature changes. Over time, these conditions can affect the integrity of the mounting system. A routine visual inspection can help spot problems before they lead to damage.
Why it matters for safety and performance
Loose mounting hardware can allow panels to shift slightly, which may create noise, reduce efficiency or place strain on the roof structure. In more serious cases, a badly secured panel could become dislodged during strong winds. That creates a risk to people, property and the solar array itself.
Mounting issues can also affect electrical components if the panel position changes or water is allowed to enter vulnerable areas. Even minor movement can increase wear over time. Keeping the hardware in good condition helps the system stay stable and reliable.
What a basic check should cover
A maintenance check should look for visible signs of rust, loose bolts, damaged brackets and any gaps where fittings should sit tightly in place. It is also sensible to inspect seals, flashings and roof attachments where the mounting system meets the roof. These areas are often exposed and can deteriorate gradually.
If panels are mounted on a ground frame or carport, the same principles apply. Check for movement, corrosion and any signs that fixings are no longer secure. After storms or high winds, a quick inspection is particularly worthwhile.
How often to inspect mounting hardware
For most UK homes, a yearly inspection is a good starting point. Some owners choose to check the system visually every few months, especially after bad weather. If the property is in a coastal area or somewhere prone to strong winds, more frequent checks may be helpful.
Professional solar servicing can include a closer look at mounting hardware, especially if the installation is older. A qualified installer or maintenance company can identify issues that are not obvious from ground level. They can also tighten or replace parts safely if needed.
When to call a professional
If you notice movement, unusual noises, visible corrosion or signs of roof damage, it is best to contact a professional. Do not climb onto the roof unless you are trained and equipped to do so safely. Working at height can be dangerous, and solar panels should only be handled by someone experienced.
Checking mounting hardware is a small part of solar panel maintenance, but it is an important one. It helps protect the panels, the roof and the people around the property. For UK homeowners, including it in regular maintenance is a sensible precaution.
Frequently Asked Questions
Solar panel maintenance mounting hardware checks are routine inspections of rails, clamps, brackets, bolts, anchors, and related fasteners to confirm that the mounting system remains secure, aligned, weather-resistant, and free of damage or corrosion.
Solar panel maintenance mounting hardware checks should typically be performed at least once or twice a year, and additionally after severe weather, roof work, or any event that may have stressed the array or mounting structure.
Solar panel maintenance mounting hardware checks should include looking for loose fasteners, cracked brackets, rust or corrosion, damaged roof penetrations, shifted rails, missing hardware, worn seals, and any signs of movement or instability in the mounting system.
Solar panel maintenance mounting hardware checks are important because loose or damaged mounting hardware can reduce system safety, cause roof leaks, damage panels, lower performance, and in extreme cases lead to panel detachment.
Solar panel maintenance mounting hardware checks should ideally be performed by a trained solar technician, roofer, or qualified maintenance professional who understands both photovoltaic systems and roof-mounted structural hardware.
Solar panel maintenance mounting hardware checks are needed immediately if you notice rattling, visible movement, tilted panels, rust, water stains indoors, cracked roof flashing, missing bolts, or after hail, high winds, or storm exposure.
Loose fasteners during solar panel maintenance mounting hardware checks are identified by visual inspection, torque verification, and checking for abnormal movement in clamps, bolts, lag screws, and rail connections.
Solar panel maintenance mounting hardware checks evaluate rust on steel parts, oxidation on aluminum components, galvanic corrosion between dissimilar metals, and deterioration of protective coatings or sealants.
Solar panel maintenance mounting hardware checks help prevent roof leaks by confirming that roof attachments, flashing, sealants, and penetrations remain intact, properly sealed, and free from cracking or displacement.
Solar panel maintenance mounting hardware checks may use torque tools, visual inspection equipment, ladders or roof access systems, corrosion inspection tools, and sometimes thermal or drone-assisted imaging for hard-to-reach areas.
Many solar panel maintenance mounting hardware checks can be done without removing panels, but some situations require partial disassembly to inspect hidden attachment points, roof penetrations, or concealed corrosion.
Solar panel maintenance mounting hardware checks become more urgent after high winds, hail, heavy rain, snow loads, ice, extreme heat, or any weather event that may have shifted or stressed the mounting structure.
During solar panel maintenance mounting hardware checks, a technician looks for straight rail positioning, proper spacing, secure connections, level mounting, and any signs that the array has shifted or warped over time.
Solar panel maintenance mounting hardware checks improve system safety by reducing the risk of falling components, electrical damage from movement, roof damage, and hazards to people working near the array.
Common failures found in solar panel maintenance mounting hardware checks include loose bolts, cracked clamps, bent rails, stripped threads, corroded anchors, degraded seals, and damaged roof flashing.
Solar panel maintenance mounting hardware checks do not always require shutting down the system, but some inspections, repairs, or work near electrical components may require de-energizing the array for safety.
Solar panel maintenance mounting hardware checks support panel performance by keeping modules properly secured and aligned, which helps prevent shading changes, stress on panels, and performance losses caused by shifting hardware.
After solar panel maintenance mounting hardware checks, it is useful to keep inspection notes, photos, torque readings, repair records, replaced parts lists, and any warranty-related documentation.
Damaged parts should be replaced during solar panel maintenance mounting hardware checks as soon as cracks, corrosion, stripped threads, deformation, or failed seals are found, rather than waiting for a future inspection.
Solar panel maintenance mounting hardware checks differ because roof-mounted systems require attention to roof penetrations, flashing, and structural attachment, while ground-mounted systems focus more on foundation stability, posts, soil movement, and exposed hardware.

Ergsy Search Results
This website offers general information and is not a substitute for professional advice.
Always seek guidance from qualified professionals.
If you have any medical concerns or need urgent help, contact a healthcare professional or emergency services immediately.
Some of this content was generated with AI assistance. We've done our best to keep it accurate, helpful, and human-friendly.
- Ergsy carefully checks the information in the videos we provide here.
- Videos shown by Youtube after a video has completed, have NOT been reviewed by ERGSY.
- To view, click the arrow in centre of video.
- Most of the videos you find here will have subtitles and/or closed captions available.
- You may need to turn these on, and choose your preferred language.
- Go to the video you'd like to watch.
- If closed captions (CC) are available, settings will be visible on the bottom right of the video player.
- To turn on Captions, click settings.
- To turn off Captions, click settings again.